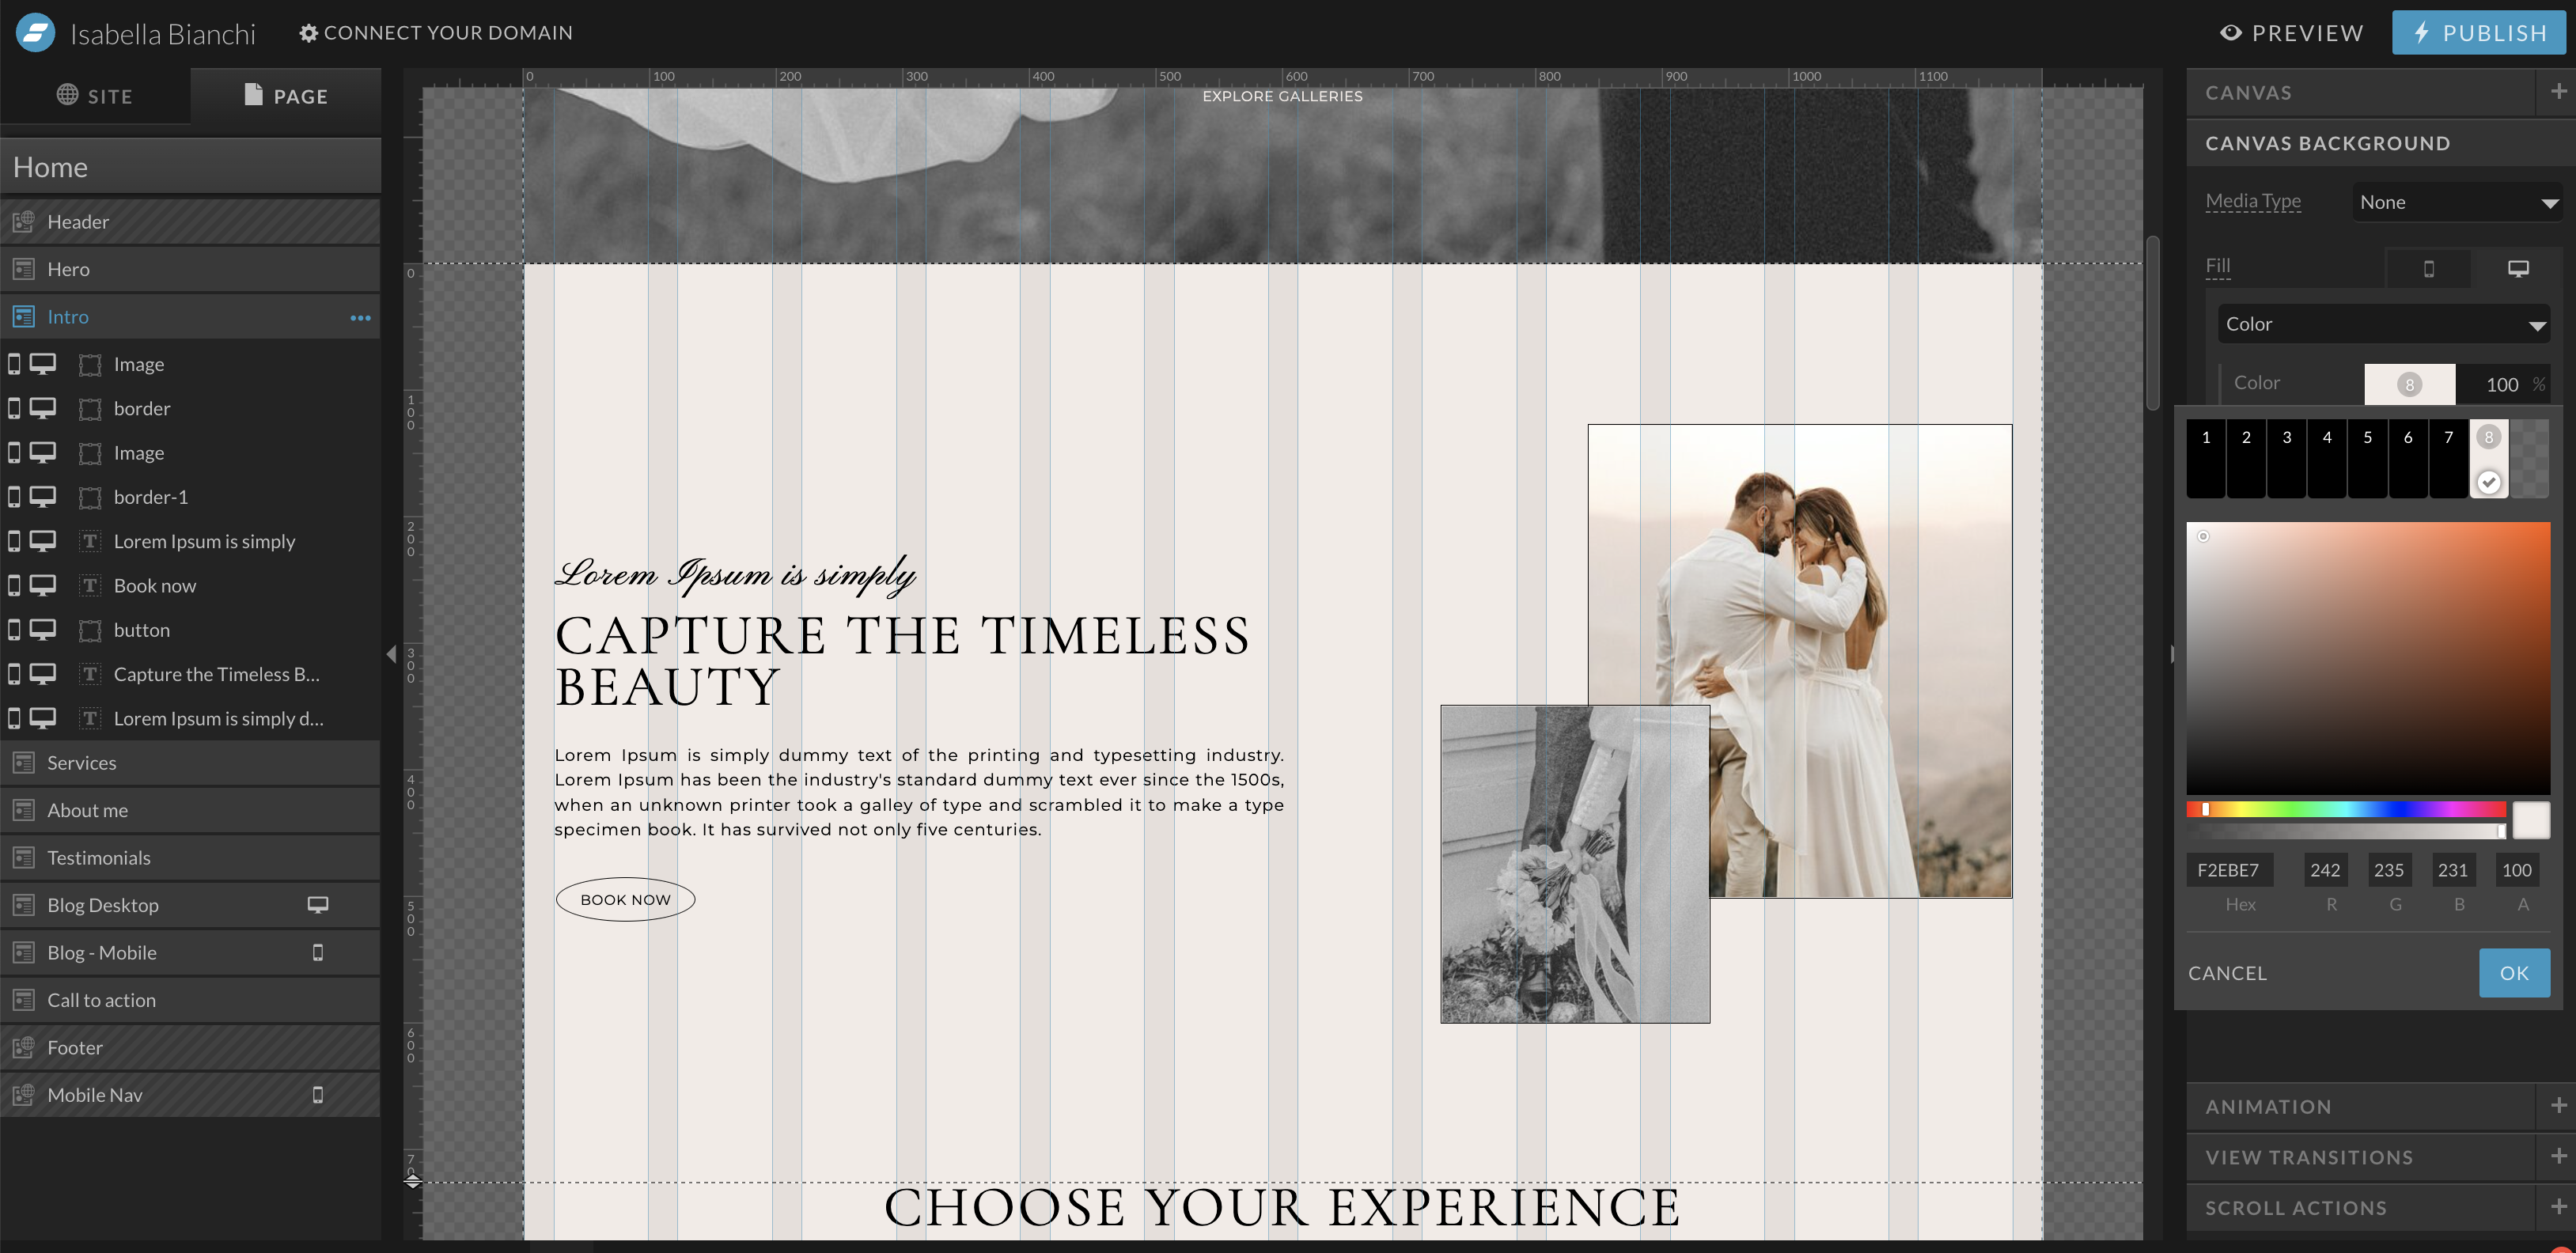
Your website is more than a digital presence; it’s an extension of your brand and identity. It’s the canvas where your story unfolds. To make that canvas uniquely yours, customization is key. With Showit, you have the creative freedom to customize your color palette and type styles. In this guide, we’ll take you through the process, and to make things even easier, we’ve included a video tutorial that walks you through each step.
THE IMPORTANCE OF CUSTOMIZATION
Customizing your website’s colors and typography is more than just a design choice – it’s a brand statement. It’s a way to ensure that your website aligns perfectly with your unique identity and leaves a lasting impression on your visitors.
COLOR PALETTE
Step 1: Access the Style Editor
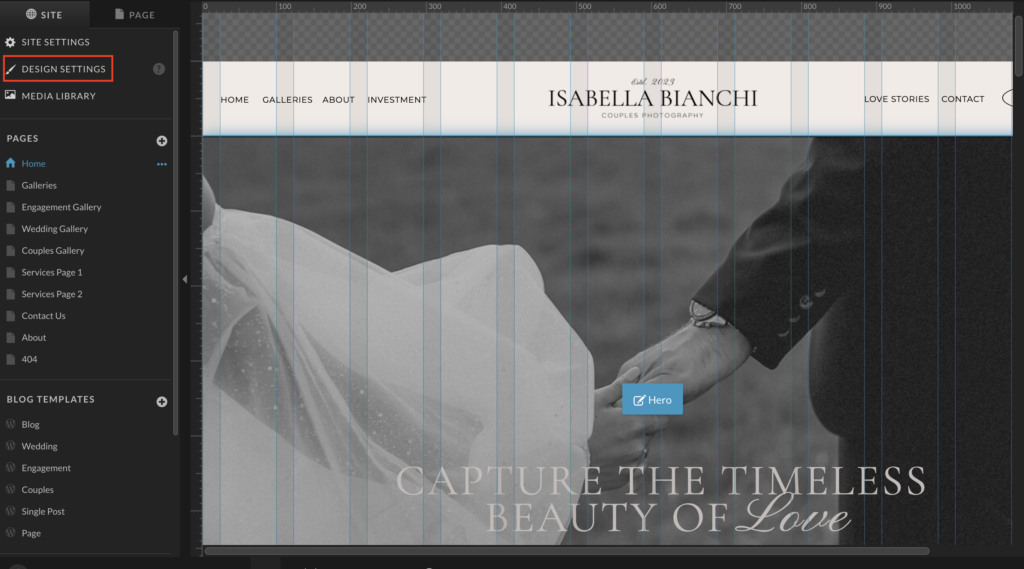
The Style Editor is your gateway to customization in Showit. To access it, follow these steps:
In the Showit builder, look to the left sidebar, where you’ll find design settings. It will open the Style Editor where you can edit the site style & fonts.
Step 2: Define Your Color Palette
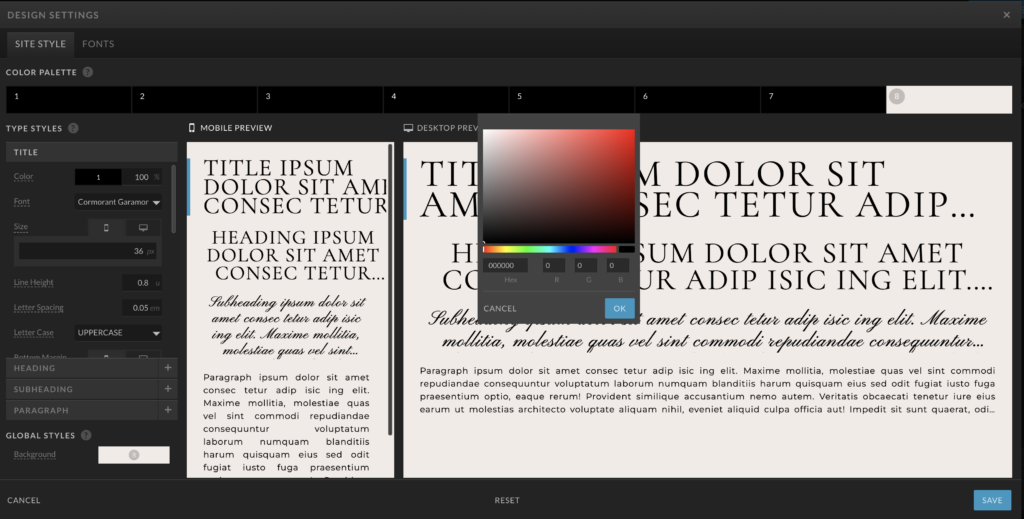
Your color palette is the foundation of your website’s visual identity. Here’s how to define it:
- Head to the “Smart Swatches” section in the Style Editor.
- Click the “+” button to add a new color swatch.
- Use the color picker to choose your desired color or input the hex code for precise matching.
- Edit existing swatches, organize them into folders, or rearrange them to suit your preferences.
Step 3: Apply Your Color Swatches
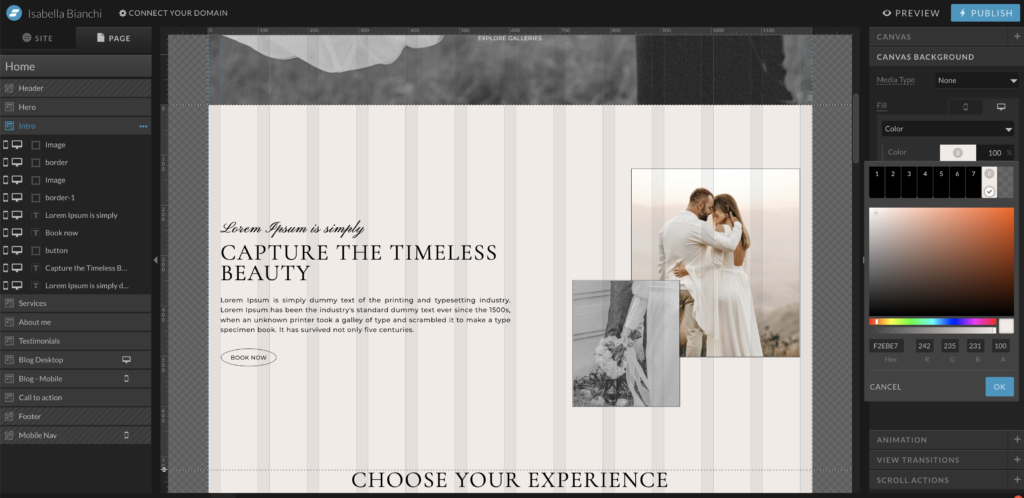
Now that you’ve defined your color palette, applying it to your website is a breeze:
Select the element on your canvas that you want to change the color of.
Use the color picker and choose the swatch from your color palette.
Step 4: Customize Type Styles
Certainly! Here’s the reworded version:
“Typography plays a crucial role in your branding, influencing both the visual appeal and readability of your website. Here’s how you can create and apply custom type styles:
- Navigate to the Type Styles section in your Style Editor. This is where you define and personalize your font styles.
- Within the Style Editor, locate the ‘Type Styles’ section.
- Click the ‘+’ button to initiate a new type style creation.
- Specify your font’s size, weight, style, and line height according to your brand’s specifications.
- Apply these customized type styles to text elements across your canvas.
Remember: Consistency is key. Just like maintaining color consistency, ensuring uniformity in your type styles contributes to a cohesive and polished appearance for your website.”
CHANGING AND ADDING FONTS
Choose fonts that align with your brand personality and aesthetics. Showit offers a selection of free Google fonts for you to choose from. which means no additional licenses are required to use them on your website for both personal and commercial projects. Google Fonts are a versatile and popular choice for web typography, and Showit makes it easy for you to access and use them in your web design. However, if you wish to incorporate custom fonts not available on Google Fonts, you will need to purchase a web license in .woff format.
To utilize Google Fonts from Showit’s library:
1. Access Design Settings: Follow the steps mentioned earlier to access the “Design” tab and then the “Fonts” option within Showit.
2. Browse Google Fonts: In the fonts selection menu, you will notice a variety of Google Fonts readily available for your use.
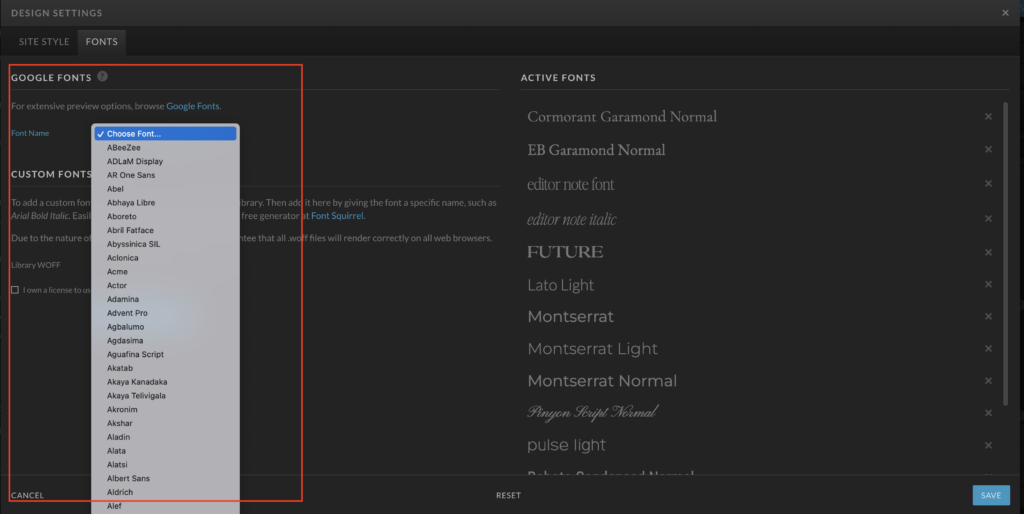
3. Select Google Fonts: Click on the Google Font you want to use, and it will be applied to your text elements seamlessly.
4. Customization: Just like with custom fonts, you can customize the style, size, and color of Google Fonts to match your website’s aesthetic.
5. Preview and Save: Always preview your changes to ensure the chosen Google Font enhances your site’s design. Once satisfied, don’t forget to save your changes.
Adding Custom Font for a Distinctive Touch
Elevate your website’s uniqueness by adding custom fonts to your design palette! In our upcoming blog post, discover how to seamlessly incorporate custom typography into your Showit website. Diving into the details, we’ll guide you through the process step-by-step. Plus, we’ve included a comprehensive video tutorial for a hassle-free experience.
READ HOW TO ADD CUSTOM FONT NOW
Wrapping Up: Make Your Mark with Customization
Your website isn’t just a digital space; it’s a reflection of your brand’s essence. Through our guide on Showit’s color and typography customization, you’ve unlocked the power to infuse your brand identity into every pixel. Embrace the art of personalization, ensuring that every element aligns seamlessly with your story. Start crafting a digital presence that leaves an indelible mark on your visitors!
Leave a Reply Cancel reply
Read the latest
© Your site here 2023. All Rights Reserved.
Site Credit
Lorem Ipsum is simply dummy text of the printing and typesetting industry.
Connect with us.
BACK TO THE TOP


